Running Spark Jupyter Notebooks Client Mode inside of a Kubernetes Cluster (with ARM for Extra Fun)
Having your Spark Notebook inside the same cluster as the executors can reduce network errors and improve uptime. Since these network issues can result in job failure, this is an important consideration. This post assumes that you’ve already set up the foundation JupyterHub inside of Kubernetes deployment; the Dask-distributed notebook blog post covers that if you haven’t.
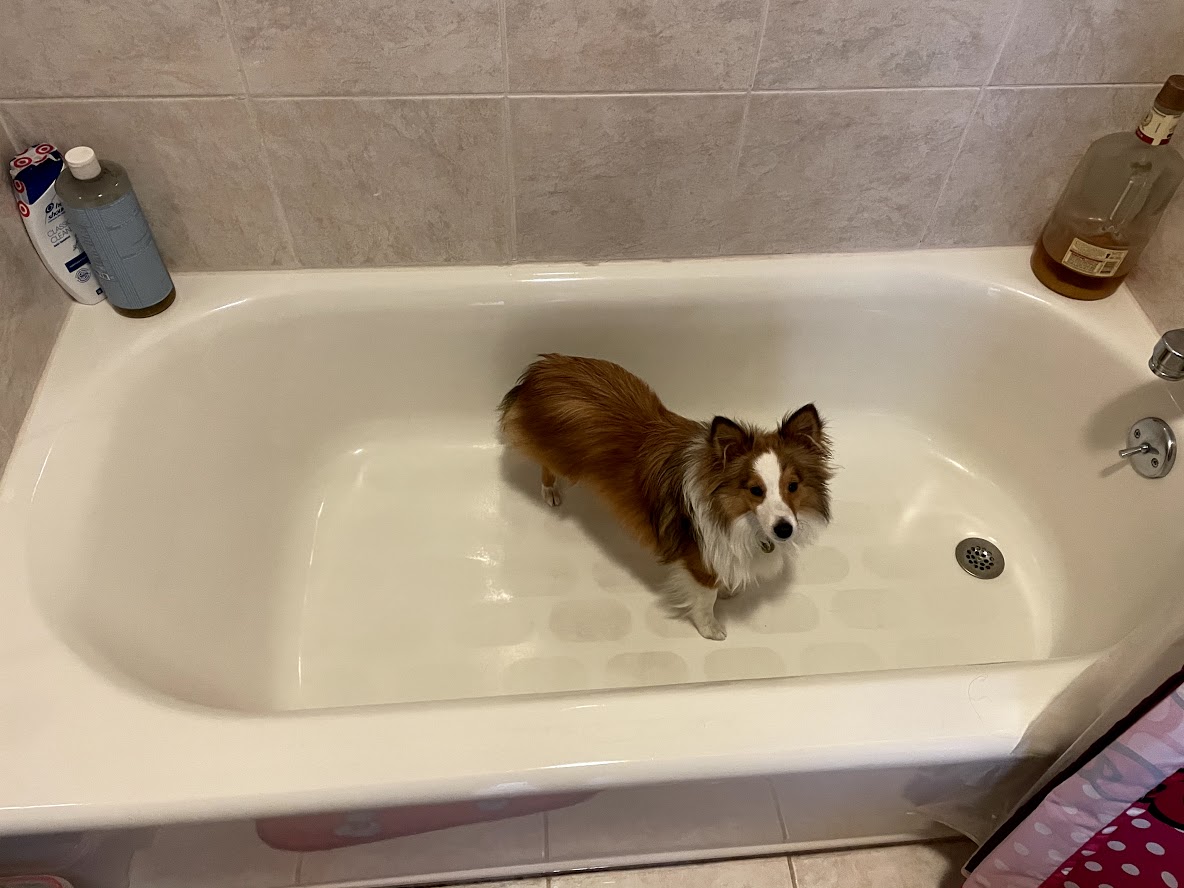
I like to think of this as washing my dog (Timbit) is a lot easier inside of the bath-tun than trying to wash him outside. Although it can take a bit of work to get him inside the tub [timbit-tub-img].
If you’re interested my YouTube playlist of Get Spark Working with Notebook inside my Kubernetes (K8s/K3s) ARM cluster shows the journey I went on to get this working. A lot of my blog posts come out of my Open Source Live Streams (which even include Timbit sometimes).
To get a Spark notebook working inside of the cluster, we need to set up a few different things. The first step, similar to dask-kubernetes, is building a container with Jupyter and Spark installed. We also need to make a container of Spark for the executors. In addition to the containers, we need to set up permissions on the cluster and ensure that the executors that your Spark driver will launch have a way to talk to the driver in the notebook.
|
Note
|
It may seem like there are extra steps here compared to dask-kubernetes. Dask-kubernetes automates some service creation, which allows for communication between the scheduler, executors, and the notebook. |
Building the Containers
We need two containers, one with Jupyter and Spark installed together and another with just Spark. Since we’re working in Python, there are some extra Python libraries we want to install as well (PyArrow, pandas, etc.) If you’ve got a specific version of a library that your project depends on, you’ll want to add it to both the Jupyter Spark driver container and the executor containers.
To start with we’ll download Apache Spark and decompress it, as shown in Download Spark, so that we can copy the desired parts inside our containers.
if [ ! -f spark-3.1.1-bin-hadoop3.2.tgz ]; then
  axel https://ftp.wayne.edu/apache/spark/spark-3.1.1/spark-3.1.1-bin-hadoop3.2.tgz
fi
rm -rf spark-3.1.1-bin-hadoop-3.2
if [ ! -d spark-3.1.1-bin-hadoop3.2 ]; then
  tar -xvf spark-3.1.1-bin-hadoop3.2.tgz
fi
# Set SPARK_HOME to extracted directory
SPARK_HOME=`pwd`/spark-3.1.1-bin-hadoop3.2
Now that we have Spark downloaded we can start customizing our Dockerfiles.
Building the Jupyter Spark Container
The easiest way to build a Jupyter Spark container is to install Spark on top of the base Jupyter container. If you’re running on ARM, you’ll need to first cross-build the base Jupyter container (see my instructions in the previous post).
In my case I’ve custom built the single-user sample Docker container from zero-to-jupyterhub-k8s to holdenk/jupyter-hub-magicsingleuser-sample:0.10.2 as I needed ARM support. If you don’t need to cross-build your custom container, you can use the pre-built container at jupyterhub/k8s-singleuser-sample as the basis for yours.
Since Spark needs Java to run, I decided to look at the jdk11 slim dockerfile to see how to install Java in a dockerfile well. If you’re an object-oriented person, you might be wishing we had multiple-inheritence with Dockerfiles, but that doesn’t work. In addition to the JDK11 dockerfile, I looked at Spark’s own Dockerfiles (includign PySpark) and the resulting Juptyer Spark Container specification is shown in Dockerfile to add Spark on top of the Jupyter Notebook container..
FROM holdenk/jupyter-hub-magicsingleuser-sample:0.10.2-n412.h25a21283

# Switch to root to install stuff
USER root

# Use multiple cores to compile the C code :)
ENV MAKEFLAGS -j 4


RUN set -eux; \
    apt-get update && \
    apt-get install -yq graphviz git build-essential cmake telnet && \
    ln -s /lib /lib64 && \
    apt install -y bash tini libc6 libpam-modules krb5-user libnss3 procps ca-certificates p11-kit wget bzip2 git mercurial subversion && \
    mkdir -p /opt/spark && \
    mkdir -p /opt/spark/examples && \
    mkdir -p /opt/spark/work-dir && \
    touch /opt/spark/RELEASE && \
    rm /bin/sh && \
    ln -sv /bin/bash /bin/sh && \
    echo "auth required pam_wheel.so use_uid" >> /etc/pam.d/su && \
    chgrp root /etc/passwd && chmod ug+rw /etc/passwd && \
    conda install -c conda-forge --yes mamba && \
    mamba install --yes python==3.8.6 && \
    pip install --upgrade pip setuptools && \
    mamba install --yes numpy==1.19.2 pandas cytoolz numba lz4 scikit-build python-blosc=1.9.2 && \
    (mamba install --yes pyarrow ||  pip install -vvv pyarrow) && \
    apt-get clean && \
    rm -rf /var/cache/apt/* && \
    rm -rf /var/lib/apt/lists/* && \
    echo -e "$NB_USER\n$NB_USER" | passwd $NB_USER


# Based on https://github.com/docker-library/openjdk/blob/master/11/jdk/slim-buster/Dockerfile

# Default to UTF-8 file.encoding
ENV LANG C.UTF-8

ENV JAVA_HOME /usr/local/openjdk-11
ENV PATH $JAVA_HOME/bin:$PATH
RUN { echo '#/bin/sh'; echo 'echo "$JAVA_HOME"'; } > /usr/local/bin/docker-java-home && chmod +x /usr/local/bin/docker-java-home && [ "$JAVA_HOME" = "$(docker-java-home)" ]
ENV JAVA_VERSION 11.0.9.1

RUN set -eux; \
	\
	arch="$(dpkg --print-architecture)"; \
# this "case" statement is generated via "update.sh"
	case "$arch" in \
# arm64v8
		arm64 | aarch64) downloadUrl=https://github.com/AdoptOpenJDK/openjdk11-upstream-binaries/releases/download/jdk-11.0.9.1%2B1/OpenJDK11U-jdk_aarch64_linux_11.0.9.1_1.tar.gz ;; \
# amd64
		amd64 | i386:x86-64) downloadUrl=https://github.com/AdoptOpenJDK/openjdk11-upstream-binaries/releases/download/jdk-11.0.9.1%2B1/OpenJDK11U-jdk_x64_linux_11.0.9.1_1.tar.gz ;; \
# fallback
		*) echo >&2 "error: unsupported architecture: '$arch'"; exit 1 ;; \
	esac; \
	\
	savedAptMark="$(apt-mark showmanual)"; \
	apt-get update; \
	apt-get install -y --no-install-recommends \
		dirmngr \
		gnupg \
		wget \
	; \
	rm -rf /var/lib/apt/lists/*; \
	\
	wget -O openjdk.tgz.asc "$downloadUrl.sign"; \
	wget -O openjdk.tgz "$downloadUrl" --progress=dot:giga; \
	\
	export GNUPGHOME="$(mktemp -d)"; \
# TODO find a good link for users to verify this key is right (https://mail.openjdk.java.net/pipermail/jdk-updates-dev/2019-April/000951.html is one of the only mentions of it I can find); perhaps a note added to https://adoptopenjdk.net/upstream.html would make sense?
# no-self-sigs-only: https://salsa.debian.org/debian/gnupg2/commit/c93ca04a53569916308b369c8b218dad5ae8fe07
	gpg --batch --keyserver ha.pool.sks-keyservers.net --keyserver-options no-self-sigs-only --recv-keys CA5F11C6CE22644D42C6AC4492EF8D39DC13168F; \
# also verify that key was signed by Andrew Haley (the OpenJDK 8 and 11 Updates OpenJDK project lead)
# (https://github.com/docker-library/openjdk/pull/322#discussion_r286839190)
	gpg --batch --keyserver ha.pool.sks-keyservers.net --recv-keys EAC843EBD3EFDB98CC772FADA5CD6035332FA671; \
	gpg --batch --list-sigs --keyid-format 0xLONG CA5F11C6CE22644D42C6AC4492EF8D39DC13168F \
		| tee /dev/stderr \
		| grep '0xA5CD6035332FA671' \
		| grep 'Andrew Haley'; \
	gpg --batch --verify openjdk.tgz.asc openjdk.tgz; \
	gpgconf --kill all; \
	rm -rf "$GNUPGHOME"; \
	\
	mkdir -p "$JAVA_HOME"; \
	tar --extract \
		--file openjdk.tgz \
		--directory "$JAVA_HOME" \
		--strip-components 1 \
		--no-same-owner \
	; \
	rm openjdk.tgz*; \
	\
# TODO strip "demo" and "man" folders?
	\
	apt-mark auto '.*' > /dev/null; \
	[ -z "$savedAptMark" ] || apt-mark manual $savedAptMark > /dev/null; \
	apt-get purge -y --auto-remove -o APT::AutoRemove::RecommendsImportant=false; \
	\
# update "cacerts" bundle to use Debian's CA certificates (and make sure it stays up-to-date with changes to Debian's store)
# see https://github.com/docker-library/openjdk/issues/327
#     http://rabexc.org/posts/certificates-not-working-java#comment-4099504075
#     https://salsa.debian.org/java-team/ca-certificates-java/blob/3e51a84e9104823319abeb31f880580e46f45a98/debian/jks-keystore.hook.in
#     https://git.alpinelinux.org/aports/tree/community/java-cacerts/APKBUILD?id=761af65f38b4570093461e6546dcf6b179d2b624#n29
	{ \
		echo '#!/usr/bin/env bash'; \
		echo 'set -Eeuo pipefail'; \
		echo 'if ! [ -d "$JAVA_HOME" ]; then echo >&2 "error: missing JAVA_HOME environment variable"; exit 1; fi'; \
# 8-jdk uses "$JAVA_HOME/jre/lib/security/cacerts" and 8-jre and 11+ uses "$JAVA_HOME/lib/security/cacerts" directly (no "jre" directory)
		echo 'cacertsFile=; for f in "$JAVA_HOME/lib/security/cacerts" "$JAVA_HOME/jre/lib/security/cacerts"; do if [ -e "$f" ]; then cacertsFile="$f"; break; fi; done'; \
		echo 'if [ -z "$cacertsFile" ] || ! [ -f "$cacertsFile" ]; then echo >&2 "error: failed to find cacerts file in $JAVA_HOME"; exit 1; fi'; \
		echo 'trust extract --overwrite --format=java-cacerts --filter=ca-anchors --purpose=server-auth "$cacertsFile"'; \
	} > /etc/ca-certificates/update.d/docker-openjdk; \
	chmod +x /etc/ca-certificates/update.d/docker-openjdk; \
	/etc/ca-certificates/update.d/docker-openjdk; \
	\
# https://github.com/docker-library/openjdk/issues/331#issuecomment-498834472
	find "$JAVA_HOME/lib" -name '*.so' -exec dirname '{}' ';' | sort -u > /etc/ld.so.conf.d/docker-openjdk.conf; \
	ldconfig; \
	\
# basic smoke test
	fileEncoding="$(echo 'System.out.println(System.getProperty("file.encoding"))' | jshell -s -)"; [ "$fileEncoding" = 'UTF-8' ]; rm -rf ~/.java; \
	javac --version; \
	java --version


# Based on the Spark dockerfile

COPY jars /opt/spark/jars
COPY bin /opt/spark/bin
COPY sbin /opt/spark/sbin
COPY kubernetes/dockerfiles/spark/entrypoint.sh /opt/
# Wildcard so it covers decom.sh present (3.1+) and not present (pre-3.1)
COPY kubernetes/dockerfiles/spark/decom.sh* /opt/
COPY examples /opt/spark/examples
COPY kubernetes/tests /opt/spark/tests
COPY data /opt/spark/data
# We need to copy over the license file so we can pip install PySpark
COPY LICENSE /opt/spark/LICENSE
COPY licenses /opt/spark/licenses

ENV SPARK_HOME /opt/spark

# Note: don't change the workdir since then your Jupyter notebooks won't persist.
RUN chmod g+w /opt/spark/work-dir
# Wildcard so it covers decom.sh present (3.1+) and not present (pre-3.1)
RUN chmod a+x /opt/decom.sh* || echo "No decom script present, assuming pre-3.1"

# Copy pyspark with setup files and everything
COPY python ${SPARK_HOME}/python

# Add PySpark to PYTHON_PATH

RUN pip install -e ${SPARK_HOME}/python

# Add S3A support
ADD https://repo1.maven.org/maven2/com/amazonaws/aws-java-sdk-bundle/1.11.563/aws-java-sdk-bundle-1.11.563.jar ${SPARK_HOME}/jars/
ADD https://repo1.maven.org/maven2/org/apache/hadoop/hadoop-aws/3.2.0/hadoop-aws-3.2.0.jar ${SPARK_HOME}/jars/

#tag::iceberg[]
ADD https://repo1.maven.org/maven2/org/apache/iceberg/iceberg-spark3-runtime/0.11.0/iceberg-spark3-runtime-0.11.0.jar ${SPARK_HOME}/jars/
ADD https://repo1.maven.org/maven2/org/apache/iceberg/iceberg-spark3-extensions/0.11.0/iceberg-spark3-extensions-0.11.0.jar ${SPARK_HOME}/jars/
ADD https://repo1.maven.org/maven2/org/apache/iceberg/iceberg-spark3/0.11.0/iceberg-spark3-0.11.0.jar ${SPARK_HOME}/jars/
#ADD https://repo1.maven.org/maven2/org/apache/iceberg/iceberg-parquet/0.11.0/iceberg-parquet-0.11.0.jar ${SPARK_HOME}/jars/
#ADD https://repo1.maven.org/maven2/org/apache/iceberg/iceberg-core/0.11.0/iceberg-core-0.11.0.jar ${SPARK_HOME}/jars/
#ADD https://repo1.maven.org/maven2/org/apache/iceberg/iceberg-arrow/0.11.0/iceberg-arrow-0.11.0.jar ${SPARK_HOME}/jars/
#ADD https://repo1.maven.org/maven2/org/apache/iceberg/iceberg-data/0.11.0/iceberg-data-0.11.0.jar ${SPARK_HOME}/jars/
#end::iceberg[]

RUN chmod a+rx ${SPARK_HOME}/jars/*.jar


# Switch to the user back to a non-root user that will actually do the running
USER $NB_USER

# Should match the service
EXPOSE 2222
EXPOSE 7777
Since the Dockerfile copies parts of Spark in, remember to save it at the root of where you decompressed the Spark tarball.
If you’re not cross building, you can build this with a regular docker build, in my case since I’m targetting arm and x86 I did built it as shown in Build Spark notebook container.
docker buildx build -t holdenk/spark-notebook:v${SPARK_VERSION} --platform linux/arm64,linux/amd64 --push .|
Note
|
An alternative would have been to take the JDK-11 containers as a starting point, and install Jupyter on top of it, but when I tried that I found it more complicated. |
This gives us a container with both Spark and the base notebook layer together. For the executors, we don’t want to bother shipping Jupyter, so we’ll build a seperate container for the executors.
Building the Executor Container
Spark does not ship pre-built containers for its executors, so regardless of which arch you’re using, you will need to build the executor containers.
If you’re building multi-arch containers, you will need to update Spark’s docker image tool. You will need to change the buildx option to push the images by adding "--push" to the docker buildx commands in the script for ./bin/docker-image-tool.sh.
Spark’s Python container Dockerfile installs an older version of Python without any dependencies, so you will want to customize your Python container setup, as well. My Dockerfile is shown in Dockerfile customizing PySpark setup.
#
# Licensed to the Apache Software Foundation (ASF) under one or more
# contributor license agreements.  See the NOTICE file distributed with
# this work for additional information regarding copyright ownership.
# The ASF licenses this file to You under the Apache License, Version 2.0
# (the "License"); you may not use this file except in compliance with
# the License.  You may obtain a copy of the License at
#
#    http://www.apache.org/licenses/LICENSE-2.0
#
# Unless required by applicable law or agreed to in writing, software
# distributed under the License is distributed on an "AS IS" BASIS,
# WITHOUT WARRANTIES OR CONDITIONS OF ANY KIND, either express or implied.
# See the License for the specific language governing permissions and
# limitations under the License.
#

ARG base_img

FROM $base_img
WORKDIR /

# Reset to root to run installation tasks
USER 0

ENV PATH /opt/conda/bin:$PATH

RUN mkdir ${SPARK_HOME}/python

RUN apt-get update --fix-missing && \
    apt-get install -yq graphviz git build-essential cmake telnet && \
    apt install -y bash tini libc6 libpam-modules krb5-user libnss3 procps ca-certificates p11-kit wget bzip2 git mercurial subversion && \
    rm /bin/sh && \
    ln -sv /bin/bash /bin/sh

COPY bin/pysetup.sh /pysetup.sh
RUN chmod a+x /pysetup.sh && ./pysetup.sh
RUN conda install -c conda-forge --yes mamba && \
    mamba install --yes python==3.8.6 && \
    pip install --upgrade pip setuptools && \
    mamba install --yes numpy==1.19.2 pandas cytoolz numba lz4 scikit-build python-blosc=1.9.2 && \
    (mamba install --yes pyarrow ||  pip install -vvv pyarrow)

# s3a support
#tag::s3a[]
ADD https://repo1.maven.org/maven2/org/apache/hadoop/hadoop-aws/3.2.0/hadoop-aws-3.2.0.jar ${SPARK_HOME}/jars/
ADD https://repo1.maven.org/maven2/com/amazonaws/aws-java-sdk-bundle/1.11.563/aws-java-sdk-bundle-1.11.563.jar ${SPARK_HOME}/jars/
#end::s3a[]

#tag::iceberg[]
ADD https://repo1.maven.org/maven2/org/apache/iceberg/iceberg-spark3-runtime/0.11.0/iceberg-spark3-runtime-0.11.0.jar ${SPARK_HOME}/jars/
ADD https://repo1.maven.org/maven2/org/apache/iceberg/iceberg-spark3-extensions/0.11.0/iceberg-spark3-extensions-0.11.0.jar ${SPARK_HOME}/jars/
ADD https://repo1.maven.org/maven2/org/apache/iceberg/iceberg-spark3/0.11.0/iceberg-spark3-0.11.0.jar ${SPARK_HOME}/jars/
#ADD https://repo1.maven.org/maven2/org/apache/iceberg/iceberg-parquet/0.11.0/iceberg-parquet-0.11.0.jar ${SPARK_HOME}/jars/
#ADD https://repo1.maven.org/maven2/org/apache/iceberg/iceberg-core/0.11.0/iceberg-core-0.11.0.jar ${SPARK_HOME}/jars/
#ADD https://repo1.maven.org/maven2/org/apache/iceberg/iceberg-arrow/0.11.0/iceberg-arrow-0.11.0.jar ${SPARK_HOME}/jars/
#ADD https://repo1.maven.org/maven2/org/apache/iceberg/iceberg-data/0.11.0/iceberg-data-0.11.0.jar ${SPARK_HOME}/jars/
#end::iceberg[]

#tag::perms[]
RUN chmod a+rx ${SPARK_HOME}/jars/*.jar
#end::perms[]


COPY python/pyspark ${SPARK_HOME}/python/pyspark
COPY python/lib ${SPARK_HOME}/python/lib

WORKDIR /opt/spark/work-dir
ENTRYPOINT [ "/opt/entrypoint.sh" ]

# Specify the User that the actual main process will run as
ARG spark_uid=185
USER ${spark_uid}
You’ll see this file references pysetup.sh which installs Python using Miniforge so we can support arm as shown in Setup python.
#!/bin/bash

set -ex
export arch=$(uname -m)
if [ "$arch" == "aarm64" ]; then
  arch="arm64";
fi
wget --quiet https://github.com/conda-forge/miniforge/releases/download/4.8.5-1/Miniforge3-4.8.5-1-Linux-${arch}.sh -O ~/miniforge.sh
chmod a+x ~/miniforge.sh
~/miniforge.sh -b -p /opt/conda
/opt/conda/bin/conda clean -tipsy
ln -s /opt/conda/etc/profile.d/conda.sh /etc/profile.d/conda.sh
echo ". /opt/conda/etc/profile.d/conda.sh" >> ~/.bashrc
echo "conda activate base" >> ~/.bashrc
echo ". /opt/conda/etc/profile.d/conda.sh" >> /etc/bash.bashrc
echo "conda activate base" >> /etc/bash.bashrc
source ~/.bashrc
find /opt/conda/ -follow -type f -name '*.a' -delete
find /opt/conda/ -follow -type f -name '*.js.map' -delete
/opt/conda/bin/conda clean -afy
/opt/conda/bin/conda install --yes nomkl cytoolz cmake tini
/opt/conda/bin/conda init bash
/opt/conda/bin/conda install --yes mamba
You will want to make your Dockerfile install the dependencies for your program while making sure to select the same version of Python that you have in your Jupyter container, so you may need to modify those two examples.
Once you’ve configured your enviroment, you can build your Spark image using the docker-image-tool that ships with Spark as shown in [build_exec_containers].
# Copy over python setup script so we can have matching pythons
SPARK_VERSION=3.1.1.11
cp pysetup.sh ${SPARK_HOME}/bin/
pushd ${SPARK_HOME}
SPARK_ROOT="$SPARK_HOME"
./bin/docker-image-tool.sh -r holdenk -t v${SPARK_VERSION} -X -b java_image_tag=11-jre-slim -p PyDockerfile Dockerfile build|
Warning
|
Some parts of Spark may assume a specific layout of the container, e.g. in Spark 3.1 the decommissioning integration makes certain assumptions, so be careful when making changes. |
Setting up Kubernetes Permissions
The driver program needs the ability to launch new pods for executors. To allow launching, create a service account or give permissions to the default service account (SA) . In my case, I decided to add permissions to the "dask" service account since the JupyterHub launcher (covered later) doesn’t support different service accounts depending on the notebook. I also created a special "spark" namespace to make it easier to watch what was happening. My namespace and SA setup is shown in Setup up namespace and service account.
kubectl create serviceaccount -n jhub spark
kubectl create namespace spark
kubectl create rolebinding spark-role --clusterrole=edit --serviceaccount=jhub:spark --namespace=spark
# We can't override SA in the launcher on per-container basis, so since I've already got a dask SA.
kubectl create rolebinding spark-role-to-dask-acc --clusterrole=edit --serviceaccount=jhub:dask --namespace=spark
Creating a Service (Allowing Driver-Executor Communication)
Spark depends on the executors connecting back to the driver for both the driver its self and the driver’s BlockManager. If your driver is in a different namespace, the easiest way to allow communication is to create a service to let the executors connect to the driver.
apiVersion: v1
kind: Service
metadata:
  name: driver-service
spec:
  selector:
    app: jupyterhub
    component: singleuser-server
  ports:
    - name: driver
      protocol: TCP
      port: 2222
      targetPort: 2222
    - name: blockmanager
      protocol: TCP
      port: 7777
      targetPort: 7777
type: ClusterIPkubectl apply -n jhub -f driver-service.yamlThese port numbers are arbitrary (you can pick different ones), but you’ll need to remember them when configuring your SparkContext.
Configuring Your JupyterHub Launcher
Now that you have all of the foundational components set up, it’s time to add them to your JupyterHub launcher. I did this by adding the Spark 3.0.1 option to the profileList in my config.yaml shown in [my-jupyter-config].
hub:
  image:
    name: holdenk/jupyter-hub-magichub
proxy:
  service:
    type: NodePort
  secretToken: DIFFERENTSECRET
  secretSync:
    image:
      name: holdenk/jupyter-hub-magicsecret-sync
      tag: '0.10.2'
  chp:
    image:
      name: holdenk/jconfigurable-http-proxy
      tag: '0.0.1'
ingress:
  enabled: true
  hosts:
    - holdenkarau.mooo.com
  tls:
   - hosts:
      - holdenkarau.mooo.com
     secretName: k3s-mooo-tls
singleuser:
  serviceAccountName: dask
  networkTools:
    image:
      name: holdenk/jupyter-hub-magicnetwork-tools
      tag: '0.10.2'
  image:
    name: holdenk/jupyter-hub-magicsingleuser-sample
    tag: '0.10.2'
  profileList:
    - display_name: "Minimal environment"
      description: "To avoid too much bells and whistles: Python."
      default: true
    - display_name: "Dask container"
      description: "If you want to run dask"
      kubespawner_override:
        image: holdenk/dask-notebook:v0.9.4b
    - display_name: "Spark 3.0.1 container"
      description: "If you want to run Spark"
      kubespawner_override:
        image: holdenk/spark-notebook:v3.0.1.1
prePuller:
  hook:
    image:
      name: holdenk/jupyter-hub-magicimage-awaiter
      tag: '0.10.2'
# Do something better here! It's being reworked though - https://github.com/jupyterhub/zero-to-jupyterhub-k8s/issues/1871
auth:
  type: dummy
  dummy:
    password: 'mypassword'
  whitelist:
    users:
      - user1
      - user2
You can then upgrade your previous deployment with helm upgrade --cleanup-on-fail --install $RELEASE jupyterhub/jupyterhub --namespace $NAMESPACE --create-namespace --version=0.10.2 --values config.yaml.
Configuring Your SpakContext
Now that you can launch a notebook with everything needed for Spark, it’s time to talk about configuring your SparkContext to work in this environment. You’ll need more configuration than you can get through the SparkContext constructor directly, so you will also need to import the SparkConf. Your imports might look like Spark Imports.
from pyspark import *
from pyspark.context import *
from pyspark.conf import *
In my cluster, the K8s API is available at https://kubernetes.default, so I start my configuration as in Start of Spark Conf.
conf = (SparkConf().setMaster("k8s://https://kubernetes.default")Since there are no pre-built docker images for Spark, you’ll need to configure the container image used for the executor, mine is shown in Configure Container.
.set("spark.kubernetes.container.image", "holdenk/spark-py:v3.0.1.2")Normally Spark assigns ports randomly for things like the driver and the block manager, but we need to configure Spark to bind to the correct ports, and also have the executors connect to the service we’ve created instead of trying to connect back to the hostname of the driver. My service configuration is shown in Spark Network Conf.
    .set("spark.driver.port", "2222") # Needs to match svc
    .set("spark.driver.blockManager.port", "7777")
    .set("spark.driver.host", "driver-service.jhub.svc.cluster.local") # Needs to match svc
    .set("spark.driver.bindAddress", "0.0.0.0") #  Otherwise tries to bind to svc IP, will fail
In addition to that, you’ll need to tell Spark which namespace it has permission to create executors in, shown in Spark Namespace Conf.
.set("spark.kubernetes.namespace", "spark")While it’s not essential, configuring an application name makes debugging much easier. You can do this with .set("spark.app.name", "PySparkHelloWorldInsideTheCluster").
Conclusion
The process of adding a Spark notebook to your JupyterHub launcher is a little more involved than it is for typical notebooks because of the required permissions and network connections. Moving inside the cluster from outside of the cluster can offer many advantages, especially if your connection to the cluster goes over the internet. If you aren’t familiar with Spark, there is a new version of Learning Spark by my former co-workers (or you can buy the old one I co-wrote, but it’s pretty out of date), along with Rachel & my High Performance Spark. Up next, I’m planning on deploying Ray on the cluster, then jumping back to Dask and with the GitHub and BitCoin data.